4.30.2012

Custom pencil portraits up on Daily Candy Kids today!

MerMagDailyCandyKidsPortraitCoverageHello friends! So we all know it's helpful to drop a few hints before Mother's Day to let our loved ones know what would be extra special for us, right? And Daily Candy Kids is here to help us out! Today they were so kind to mention my individual pencil portraits, found in my shop here, as a great suggestion for Mother's Day. And I couldn't agree more!

For more information on how the ordering process takes place hop on over to my illustration blog to read more and see some great before photos and after portraits. And don't delay because slots for Mother's Day portraits will fill up fast, so order yours today!

4.27.2012

Quilted Chevron Comforter

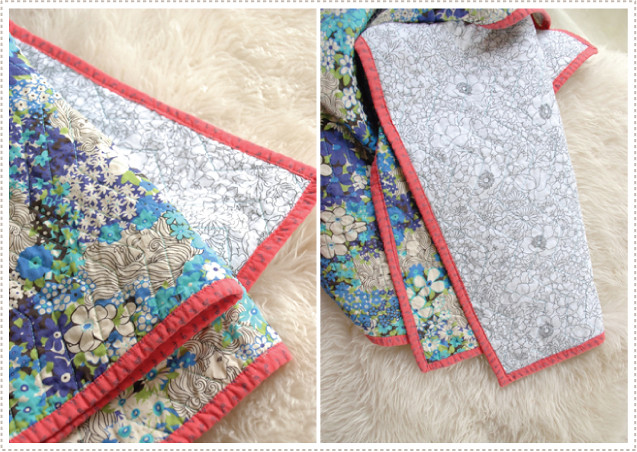
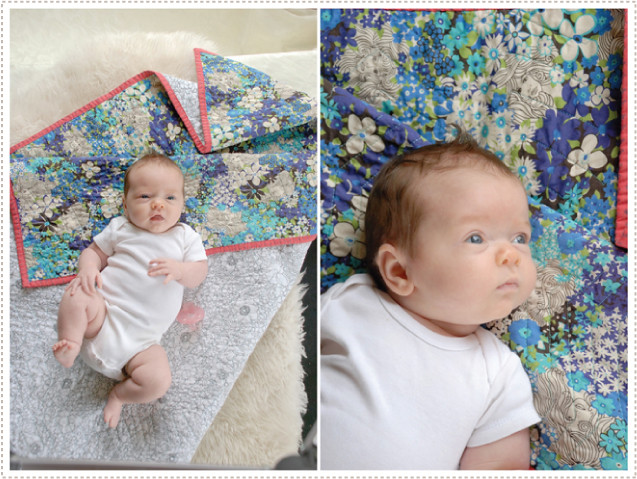
MerMagChevronQuiltedComforter1I wasn't kidding when I mentioned that this quilted herringbone comforter was my new go-to baby gift. It seriously is the best. So simple and the pay off is great. I recently made another one for my little sister Lorajean, who just had another baby girl, Evangeline (don't you just love the name!). Only this time instead of going for a quilted herringbone stitch, I simplified and went with a free style chevron quilting pattern. It was SO easy and there was really no way to mess up (I personally love that some of the zigzags are closer together and some are farther apart). Just find some great great fabric for the front and back, sandwich some batting in the middle of the two sheets, baste, and then quilt away! And you'll notice that I used the same binding from Eleanor's quilt (I'm kind of in love with it and, well I had a bunch left over) and went with Heather Bailey's tried and true continuous binding technique.

This is also great project for littles ones who are learning to sew and would love to start quilting. You could even do a mini version for a little doll or softie. Wouldn't that just be so cute?! And I promise you, you could do the entire thing in one afternoon (I did! but we won't get into my tendency to procrastinate...).
MerMagChevronQuiltedComforter2
*photos of quilt and darling baby taken by Lorajean of Lorajean's Magazine

4.24.2012

Tea Box Circus Train DIY

MerMagTeaBoxCircusTrain1b
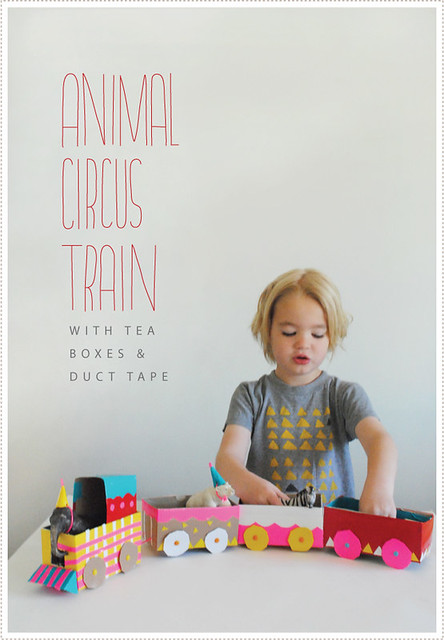
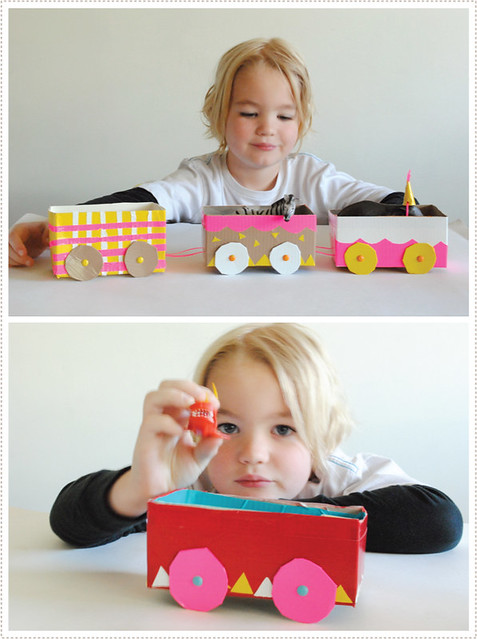
The boys and I had a fun weekend enjoying the most lovely weather outdoors as well as putting together a few impromptu projects, such as this tea box animal circus train. There's something really rewarding about creating something magical out of simple leftover pantry items, like these herbal tea boxes. And on Earth Day weekend, well I couldn't think of a better re-purpose project.
MerMagTeaBoxCircusTrain2
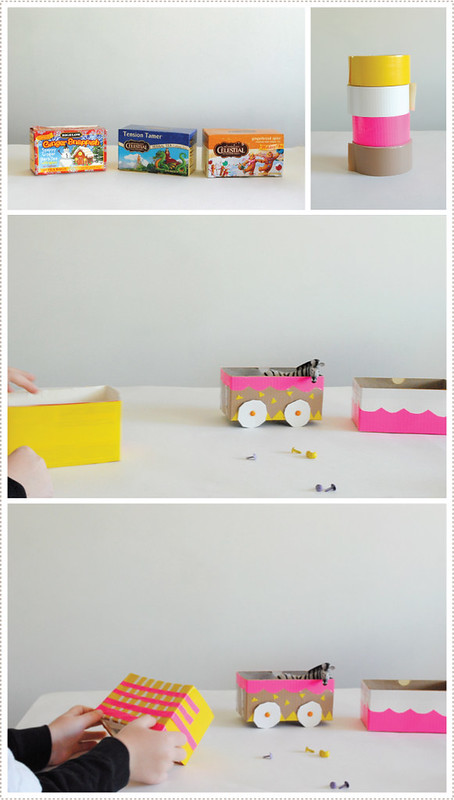
Basically we grabbed a few herbal tea boxes from the pantry and threw on some fun colorful duct tape. This helped reinforce the strength of the boxes/train cars as well as add pops of color and design. Duct tape is a little difficult to cut (super sticky) so I would suggest doing this alongside your Littles. We started with just three fun cars decorated in a simple, bright color scheme.
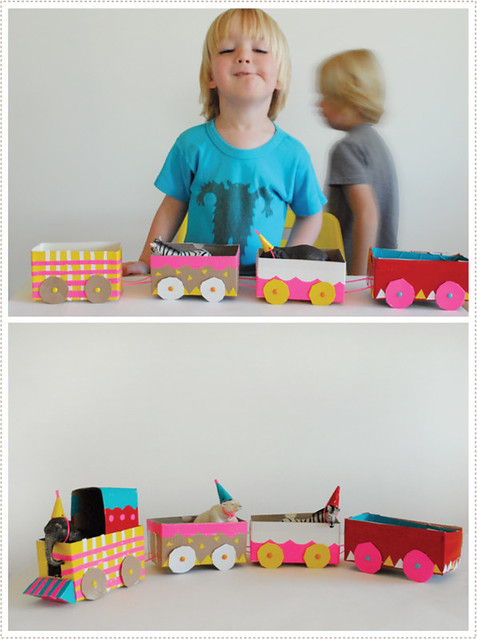
MerMagTeaBoxCircusTrain3And then A had the brilliant idea of creating an additional car (he didn't feel like it was a true train with only three cars) that could carry his aquatic animals. On his own, he came up with the idea of using blue duct tape to line the inside of the 4th car to suggest water. He then picked the color and design of the car exterior himself. I helped him cut up the tape and he placed it on. For the wheels we cut the tops of the boxes into circles, covered them in tape and secured onto the box cars with colorful brads.
We then used neon pink lanyard, and by punching small holes in the ends of cars, attached the cars together. So now we had 4 cars but no engine. And Little O and A would have none of that.
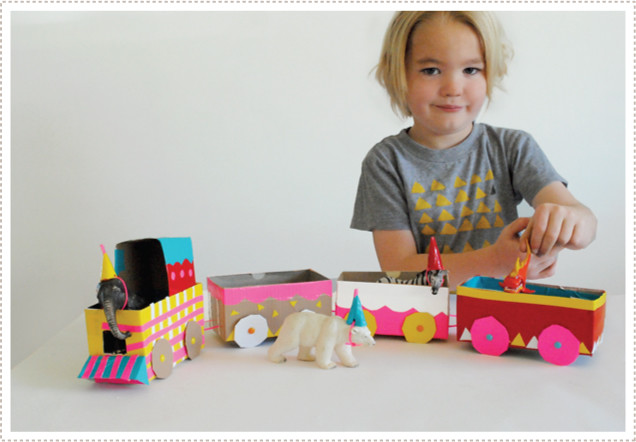
MerMagTeaBoxCircusTrain4So the next day we decided that an engine must be made. We put our heads together, found more fiber board from a couple of cereal boxes and constructed an engine, which just happened to make the perfect home for our elephant engineer. We added a few party hats to our little animal friends and a party animal circus train we had. (Little O was seriously into the whole animal party idea. He wanted to know why these animals were having a party on a train. So we spent some fun imaginative time coming up with different scenarios.)
MerMagTeaBoxCircusTrain5
The boys had so much fun with the train and spent quite a bit of time playing with it. And I have to confess, I think this might have sparked a cardboard/duct tape spree of sorts. The possibilities really are endless...

4.20.2012

Hand in Hand:Crafting with Kids Winner!

MerMagHandinHandWinner
Happy Friday friends! A big thanks to all of you who entered the Hand in Hand: Crafting with Kids Giveaway! You had some wonderful things to say about crafting and creating with kids. I was inspired!

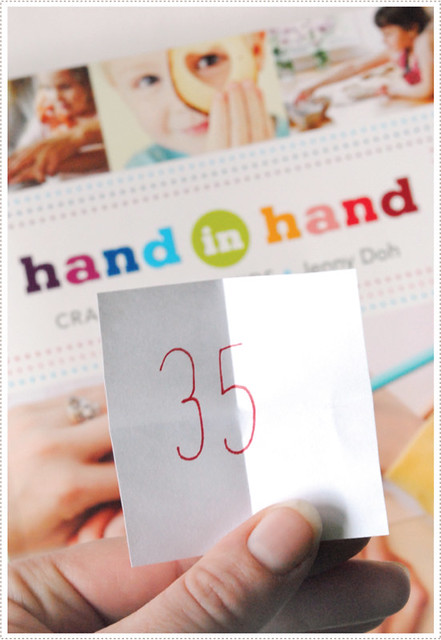
And now to announce the winner! The winner of the Hand in Hand:Crafting with Kids book giveaway is comment #35...

HAYLEY LAM

who wrote:
"I would love this book, want to try the geometric tiles!!"

Congratulations Hayley! Please contact me at merrileeliddiard [at] hotmail dot com and I'll ship your book off to you!


And I couldn't help but share a few inspiring comments from you readers to get us all crafting with our Littles this weekend!

Steph mentions:

"Lately Creed's favorite is when I draw a mystery picture in white crayon and he watercolors over it to find out what it is."


Holly Sarah shares:

"My oldest likes to use his chalkboard easel to tell stories with pictures before bedtime...one of my favorite things."


Rachael suggests:

"The best project I did with my students was making button yo-yos...that was by far their favorite, a button on a loop of string. Some of them were still pulling out their backpacks to play with three months later."


And Emily says:

"My daughter is 22 months old and one of her current favorite creative activities is "painting" on coffee filters. She draws on the filters with washable markers and then "paints" using water and small paintbrushes. After the filters are dried, we cut them into shapes, make flowers, mobiels, etc."


And there are so many more in the Hand in Hand Giveaway comment suggestion. Great reading to start your weekend off! And if you didn't win, be sure to pick up your copy of Hand in Hand: Crafting with Kids at your local bookstore or Amazon. You'll love it!

Wishing you all a creative and crafty weekend!


*Winner was selected randomly. If there was one more than one comment from the same person, it was considered as one comment total.

4.17.2012

A Happy 6th Lego Party

MerMagLegoParty1
A couple of weeks ago I promised to share with you photos from Little A's 6th birthday party, and I'm so happy to finally be able to do so! But first I have to say, I think this birthday marks the graduation of Little A's "Little" title. I know he's still technically just a little guy but I feel sort of odd calling him "Little A" here when I see just how much he's growing, learning and doing these days! It seriously blows me away. I think he just might simply be "A" now. Wow. It's a bit crazy for me but I feel it may be time. I remember when "Little O" shed his "Baby O" title and I was equally parts sadly nostalgic and eagerly excited for the future. Similar feelings accompany the shedding of A's "Little" title. And of course, as a collective, my "Littles" will probably always feel like my "Littles", and I'm sure I'll continue to refer to them as such (even when they are 18+...).

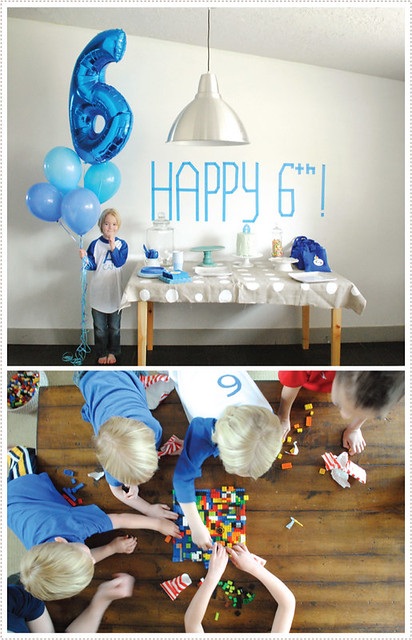
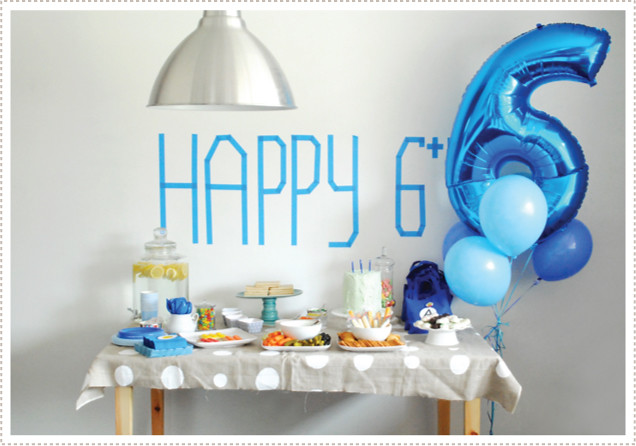
So on to the birthday celebration. A and I had tossed around a number of birthday theme ideas for this years party. I was feeling a party for party's sake (not necessarily any theme at all) and he just kept coming back to Legos. Six is a great year to delve into these little interlocking building blocks and so a Lego theme it was. I was over the moon excited about this but still wanted to keep things simple. I didn't want this to be an over-the-top, everything screams "Lego" party. So we went with an overall blue color scheme with little bright pops of Lego, here and there (Such as the candy Lego "A" that Jon constructed atop of A's cake [which promptly fell flat on it's face and into the frosting after a bump to the table. But at least we got some photos of it before hand. If you do this, I would suggest securing the candy Legos together with either frosting or melted sugar, etc. and then finding a way to actually stick it into the top of the cake).
MerMagLegoParty2
On the day of the party Jon surprised A by bringing him a bundle of balloons complete with a gigantic mylar "6". He was thrilled. And I taped out a "Happy 6th!" message (which he requested) with painters tape to the wall which he was very pleased with (in fact, he has since become obsessed with creating his own words and numbers with painters tape on the wall, and I'm quite impressed with his skill at doing so. I'll have to share these with you later). I also freezer paper stenciled "A CAT" (one of our nicknames for him) on the front of a baseball tee and then added a "6" on the back.

When the guests arrived we had them gather around the living room table to engage in a bit of free-for-all Lego play. On their own they decided that they would collectively build "Lego City" and they had quite a fun time with it. In fact, I had to nudge them a bit to get them to move onto to other games, such as "Find the Little Lego Man" in the back yard.

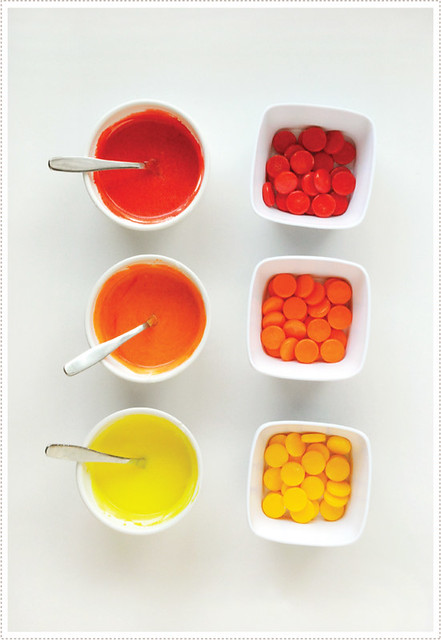
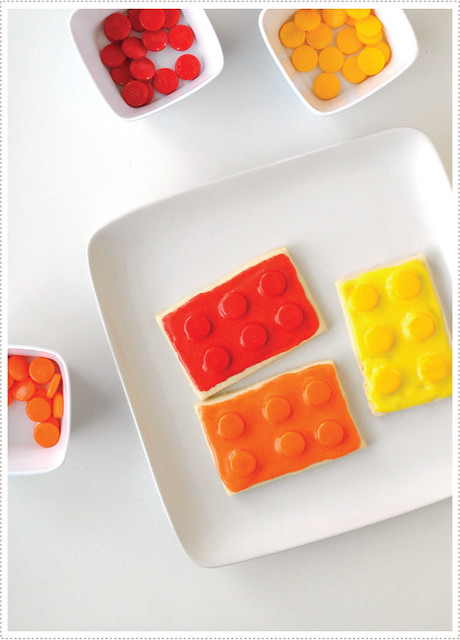
After games the little guests settled down a bit to frost and decorate their own individual Lego cookie. I used Angie Gubler's mom's recipe for the cream cheese-sugar cookies and brightly colored frosting. This is seriously the best cookie/frosting recipe I've ever tasted and it's very simple. After rolling out the dough, I simply cut out rectangles and popped them in the oven. And to create the little Lego "knobs", I purchased Spree candy, which worked incredibly well.
MerMagLegoParty3
The Littles had a great time frosting and decorating their Lego bricks...
MerMagLegoParty4
...and an even better time eating them!
MerMagLegoParty5
After the cookies were decorated, we gathered around to munch on snacks and goodies.
MerMagLegoParty9
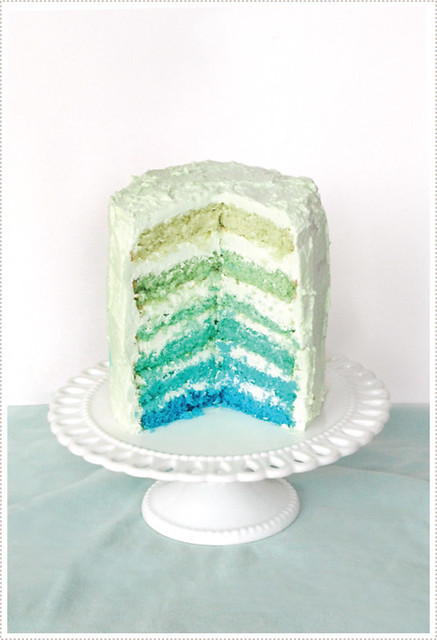
And no birthday party is complete without the cutting and distributing of the cake. This year decided that I'd try to make the cake extra special (which was something A was really keen on). I toyed around with a couple of ideas and settled on a 6 layer blue ombre cake, with each layer celebrating a year of his life. (And with only one cake pan at the size I needed, well, I was celebrating each year until 3 AM the night/morning before his party). A and the other kids loved it and I was seriously happy that it actually all came together.
MerMagLegoParty6
I used this recipe for the cake. It was rather involved but still a fun endeavor (even if I did over whip the top frosting a bit). Perhaps I'll only do this once in their little lives, on their 6th birthday. Could be a fun tradition.
MerMagLegoParty7
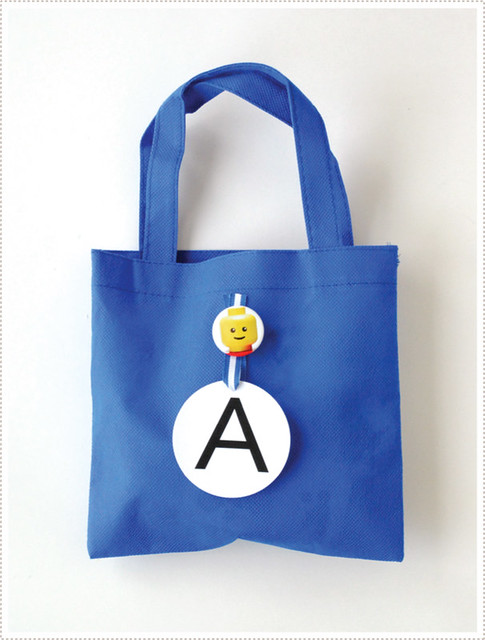
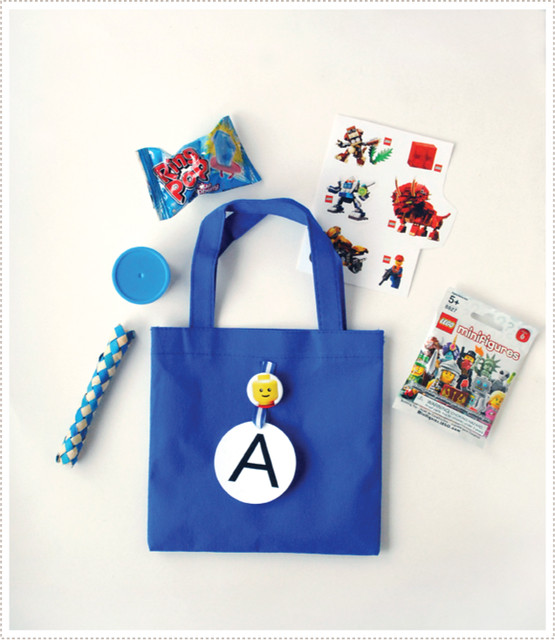
For the little guest gift bags, I made a Lego man button and pinned it to each bag, complete with their initial. I then stuffed the bags with several goodies such as a mystery Lego character in a bag, play dough, Lego stickers, a ring pop and Chinese handcuffs (my personal favorite. I played with A's the rest of the afternoon). The kids were also able to fill a few bags with jelly beans and Lego candy and take those home as well.
MerMagLegoParty8
A great time was had by all and A still talks about the party. In fact, he had a number of suggestions for what could be done for another Lego party in the future. Such as "Mom! what if we hung Legos on a string from the ceiling?!" Or, "What if you put the 'Happy Birthday' sign right outside my door, in the hallway, so that I could see it as soon as I woke up?!". Yes, I do believe the party planning gene has officially been passed on. Perhaps I just might let him do all the planning for his next birthday. Which is guaranteed to be Oh so far away. I made him promise me that.

**Oh and don't forget to enter the Hand in Hand: Crafting with Kids book giveaway! End of day Wed., April 18th, is the last day to enter. And as a reminder, I'll be announcing the winner on Friday, so stay tuned!

4.13.2012

Mer Mag in Hand in Hand: Crafting with Kids (And a Giveaway!!)

MerMagHandinHand1
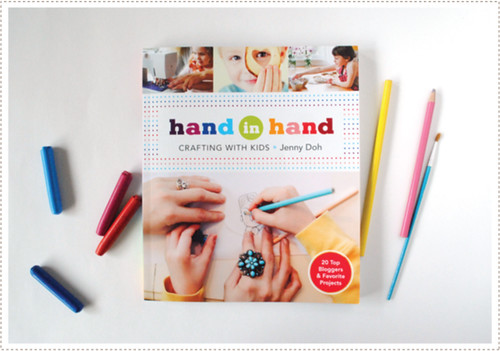
Friends, I've been dying to share this gem of a book with all of you! Hand in Hand: Crafting with Kids, by Jenny Doh, hit the shelves on April 3rd and I've been waiting until after all the Easter holiday fun was over to introduce this book you. If you are not already familiar with this new title, you are in a for a treat! It consists of 20 craft bloggers who focus on creating with kids and share one project each that you can do with your little ones. I feel so honored to have been selected to be amongst this great group and know you will love the book as much as I do.

If you follow this blog at all you'll know that I'm just a bit passionate about creating art and crafting with your kids. It has added so much to my life, and to the life of my kids. And what a treat it is to read all of the wonderful thoughts and experiences about creating with your kids from the many other bloggers in this book. I really was inspired to work hand in hand :) with my Littles, all over again!

The other contributors featured in this book are:
I was lucky enough to meat a few of these ladies in person at ALT, such as Dana Willard of MADE and Rachel Faucett of Handmade Charlotte and they are just as inspiring in person as you will find them in this book and on their blogs. Many of these other bloggers have inspired me and my kids in days past and many others have been a treat to discover and explore for the first time.

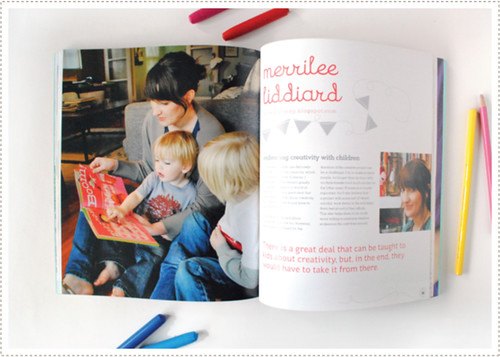
Here are a few spreads from our chapter. It was so fun to really explore and express how I feel about creativity and cultivating it in the home.
MerMagHandinHand2
There are some fun shots from our South Pasadena home that I miss from time to time. (I especially miss all that space in the kids room!).
MerMagHandinHand3
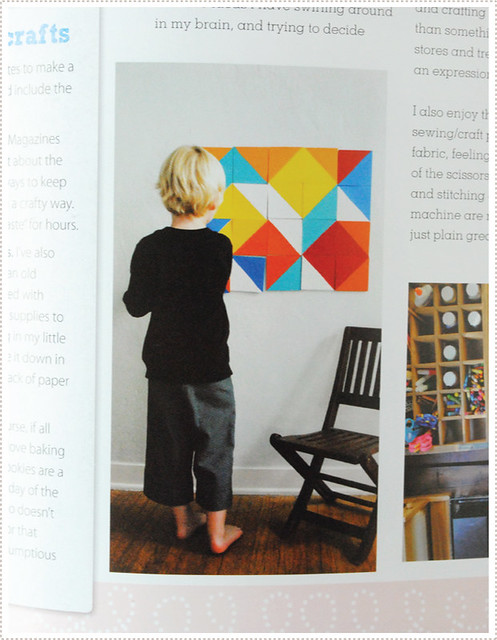
And there is a shot of how we ended up storing our geometric floor puzzle. (We adhered it to the wall with Velcro which made for some great movable wall art! And then when we wanted to have more free reign and play with it on the floor, we simply removed the tiles from the wall and placed them on the floor in fun and interesting patterns).
MerMagHandinHand4
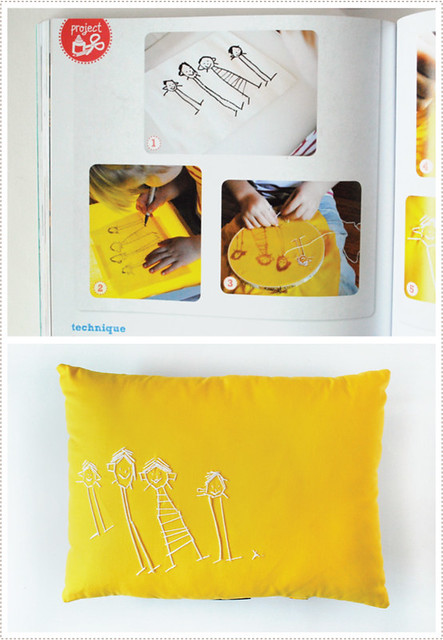
And for our craft contribution, Little A and I show you how you and your kids can make a personalized keepsake pillow from an original drawing, fabric and a bit of embroidery floss.
MerMagHandinHand5
We loved working on this together and still treasure this pillow!

If you are interested in perusing the many creative activities found in this book (which of course you are!) just leave a comment and I'll enter you into the drawing for a free book! And I'd LOVE to hear something creative (big or small) that you and your little one(s) love to do together.

You have until the end of Wed. April 18th to comment and enter the Hand in Hand book giveaway! From there I will randomly select a number from the comments and reveal who has won the book a week from today, Friday, April 20th.

4.09.2012

An Easter recap: Or How to Style a New Look For Your Kids From What They Already Have

MerMagBoys2012EasterWardrobe1
I hope all of you had a most lovely holiday weekend. We are stuffed to the gills with delicious chocolates, candies and...well, more chocolate, and more candy! Every year I try to go for less candy and it seems like every year we end up with just a bit more than the year before (I think it's all those extra egg hunts that I wasn't calculating into my candy consumtion ratio). I'm definitely going to have to figure out the formula for the perfect balance one of these years. Well at least I did have a slew of stickers in the mix to help things out a bit.
MerMagBoys2012EasterWardrobe2
And remember when I mentioned that I had no idea what my Littles would be wearing this year? Well, that was no lie. And I can't deny, that made me a little sad. I love to sew for my children and feel like I haven't been able to do so as much as I'd like to as of late. So I was really counting on Easter to sink my teeth into a great project, such as a pair vintage inspired suits or something equally inspiring.

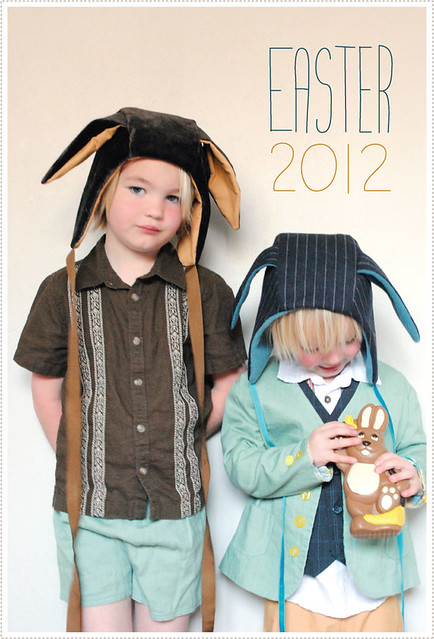
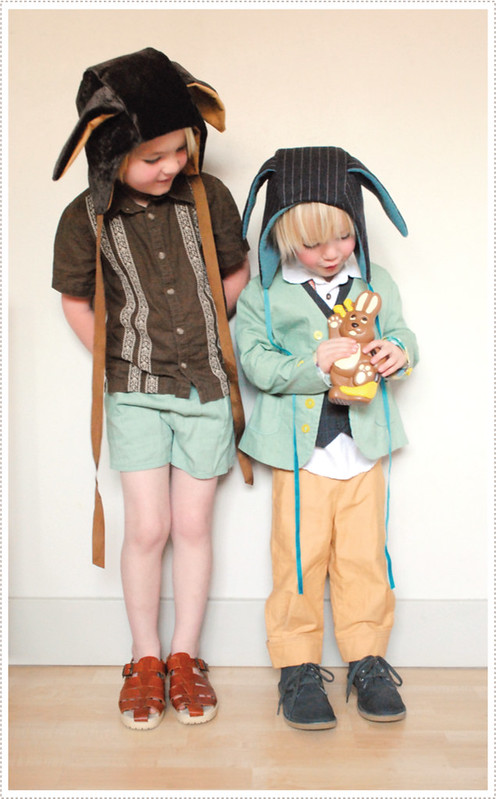
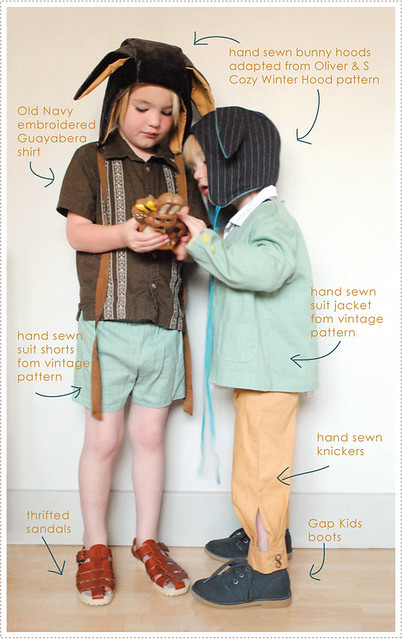
Well, I didn't manage to sneak in enough time to sew any suits this year...but I did at least get a little sewing in. Thanks to Leisel of Oliver & S, I managed to sew two bunny hoods adapted from her Cozy Winter Hood pattern found in her Little Things to Sew book. (And I can't help but give a shout out to two friends involved in the identity of the Oliver & S brand; designer friend, Brooke Reynolds, and illustrator friend Dan Andreasen [he illustrates their paper dolls]. OK and my own little shout out and teeny, tiny, contribution: I helped Brooke find Dan for the job back when I worked in NY as an illustration agent. And he's just so perfect, don't you think?! So needless to say, I'm pretty much in love with all things Oliver & S - and that's not even getting into how utterly darling Liesel's patterns are!).
MerMagBoys2012EasterWardrobe3
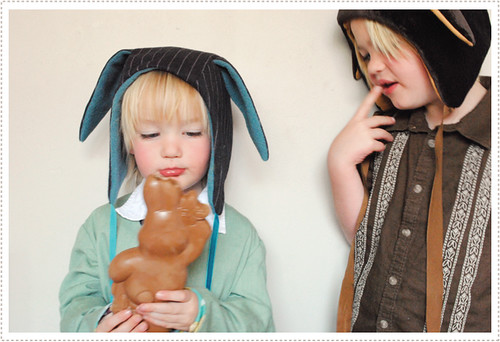
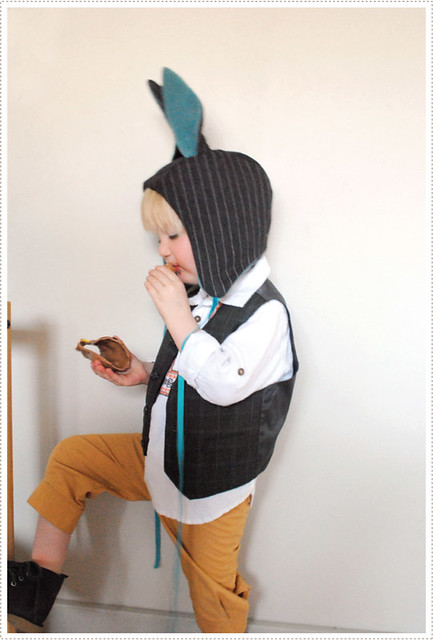
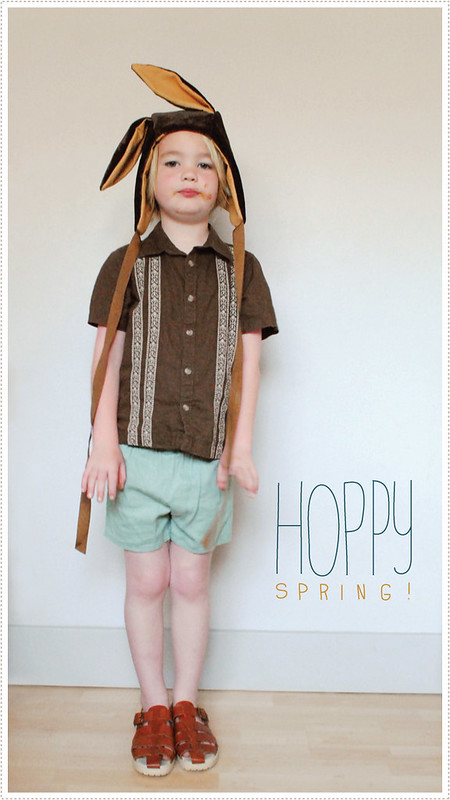
So back to the hoods. To make these I used the Cozy Winter Hood pattern from the book and changed up the ears to be two long and floppy bunny ears - to fit the festive occasion of course. I really wanted use fabric I had on hand so I used some of Jon's old pants and blue fleece for Little O's bunny hood and some brown velvet and leftover tan fabric for Little A's. And once I was finished with these, and placed them on their little heads, I couldn't hold back my motherly squeals of delight. The boys just looked too darn cute. (And something tells me that this is the last year I'm going to get away with such "cute" items of clothing for Little A. In fact, it took him realizing that these looked like their hooded bath towels [something I hadn't even thought of] to help him feel like they were cool enough to wear. That and a Belgium chocolate bunny).

As for the rest of their Easter ensemble, well if you follow my blog at all, you'll quickly see that it ended up being an mix-n-match amalgamation of clothing from the past. And you know what, I really couldn't be more pleased with how it all came together. I might even like how it turned out better than if I had planned the whole look out from the beginning.

I've always been a big proponent of finding great style by using a large percentage what you already have in your closet. I believe "styling" an outfit is 80% of what makes a person look stylish or well put together. In fact, my dear friend Mara blogged about just such a concept when she invited J.Crew stylist, Marina Dobreva, to share a few tips. Some of my favorite tips from Marina are:

-"Force yourself to try new things with your wardrobe. Take some items from your own closet that you never thought you'd wear together and try new ways to put together an outfit."

and

-"Mistakes and Lack of Finances often make for the best style ideas!"
MerMagBoys2012EasterWardrobe4
I believe that this holds true not only for our own closets, but for our little ones as well! So when I was up against a wall this Easter, I went scrounging through my Littles closets to see what sort of magic I could muster up. And if you care to take a look at a few of these posts from the past, you'll see where just about everything came from (OK, and you'll be forced to go down memory lane with me, realizing just how little my Littles once were and wonder with me "where did those chunky cheeks and legs go to anyway?"). Take a look here: 1, 2, 3, 4.

I really love the eclectic, "Mexican wedding shirt, meets little story book French boy, meets a hint of something Scandinavian", look to the final overall ensemble. Again, something I couldn't have planned if I hadn't been forced to get creative.
MerMagBoys2012EasterWardrobe5
And if you are wanting to do something similar, I think it helps to have slowly built up an arsenal of items that you are fond of and can work with. Here are just a few tips I would share with you on how to build up your child's wardrobe so that you can make some mix-n-match magic any time, and for any occasion.

TIPS FOR CREATING A GREAT KIDS WARDROBE THAT BOTH YOU AND YOUR KIDS WILL LOVE:
  1. Have an assortment of some really great and simple staples that you can use to layer and mix-n-match (i.e. solid knit shirts, button ups, sweaters, French striped tees, staple jeans and slacks, dresses, skirts, etc.)
  2. Throw in an mix of vintage/thrifted goods to keep things fresh, unique and unexpected. I love the timeless quality you get whenever you introduce something vintage. And you can pretty much bet that now one else will have that same piece.
  3. Buy just a few unique, statement pieces from some of your favorite kids designers. They don't have to be outrageously expensive (I love to buy from Etsy) but don't be afraid to stretch just a bit on one or two unique shirts, that one-of-a-kind sweater, a stand out colorful skirt or those bright yellow pants that are sure to make any outfit pop. (And I confess, if you know another kid will be wearing it down the road, it makes more sense to buy a few pieces that stand the test of time both in design and quality). Read more about my thoughts on mixing hi+low here.
  4. Make some of you own clothes! You don't have to sew to do this. You could dress up a few t-shirts with freezer paper stencils, freehand a fun illustration with fabric paint, or refashion thrifted finds. And if you do know how to sew, by all means, do it! Find whatever time you can to sew something special here or there. It will make a big impact on your kids closet. In fact, 75% of the clothing found in this years Easter ensembles are from past items I have sewn.
  5. Don't be afraid to play with sizing. I know that this might sound odd, but I'm telling you, don't feel like you have to stick with what the tag says. I know a number of t-shirts and jackets that look better a bit more snug than the tag suggests. And when you are working with skirts, capris and gauchos, well there is quite a range of sizes you can work with (adjusting the waist to fit of course). Just don't be afraid to try it. You never know what might end up creating the perfect balance. That slightly snug sweater from 2 years ago, slung over that boxy blouse, paired with a tutu and tiara must might be the right ticket. And if you don't like it, well just go back to what you were doing before. No harm done.
  6. Let your kids have a say in it. Oft times letting them mix that batman shirt with those tailored dress pants and flip flops turns out to be better than anything you could have preplanned. Kids are seriously some of the best stylists...seriously. In fact, I actually try to put together my little ones wardrobes to that they can pull out pretty much anything they want and it more or less works. And if not, well, just pat yourself on the back for fostering independence. (See that sliver of red sports shorts, worn by Little A, seen ever so slightly in this pic? Do I love how they go with that much adored Winter Water Factory top. No. Not really. But our house rule is that when you get home from school, you can change into whatever you want...so that means that Little A is wearing comfortable sport shorts pretty much every afternoon. But hey, if he stuck it out with the skinny jeans at school, I think he's entitled.) *Oh and another soap box side note: Having your kids give input doesn't mean you have to only have a wardrobe entirely comprised of Dora and Buzz Light year because that is what your kid is into and you don't want to "squash their identity". Well guess what, Nick Jr. or Disney already chose their "identity" and they are just responding to what they were exposed/enticed to (I can appreciate both of these networks btw, but just in moderation, and when using thoughtful selection) . You are in charge of giving them a gamut of options and have a great opportunity here to teach them diversity of design and trying new things.
  7. Buy fun/great shoes! An ordinary grey knit shirt with some simple dark jeans turns into the perfect outfit with paired with some really great orange converse.
  8. Just try it and don't over think it. Kids fashion should be fun, easy, unexpected, and a reflection of them! Sometimes it might look silly and others might not appreciate it. Buy hey, they are kids! you can get away with it. And fashion should be fun and just a little unexpected. I once had a friend tell me that "If I didn't feel just a little silly at first when trying something new, then I wasn't approaching fashion right".
MerMagBoys2012EasterWardrobe6
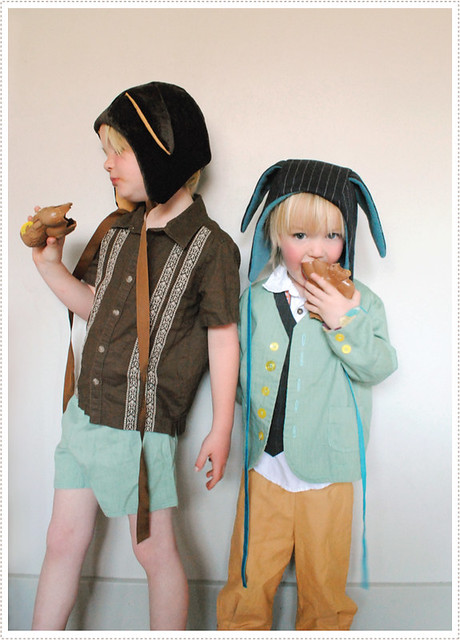
Well anyway, we had fun. The boys enjoyed seeing their old clothes brought out again and were right there with me in deciding which boy would wear what and found it rather humorous that both of them got to wear elements of the same suit at the same time.
MerMagBoys2012EasterWardrobe7
And I was pleased with how Little O's look continued to surprise and delight even when deconstructed. I was afraid that this Gap Kids embroidered guayabera shirt would not pair well with the rest of things but ended up loving the element of the unexpected.
MerMagBoys2012EasterWardrobe8
And my two little bunnies? Well if nothing else, in the end they were happy to have devoured an entire chocolate bunny and then happily hop onto other things such shredding apart those much anticipated surprise balls. And me, well I couldn't have been more pleased with how things serendipitously turned out.
MerMagBoys2012EasterWardrobe9
So what about you? What are some of your favorite staples or tricks to styling your kids wardrobes? Any favorite places to shop? I always love to hear new ideas and great resources!

4.04.2012

Easter Stickers Download!

MerMagEasterStickers1
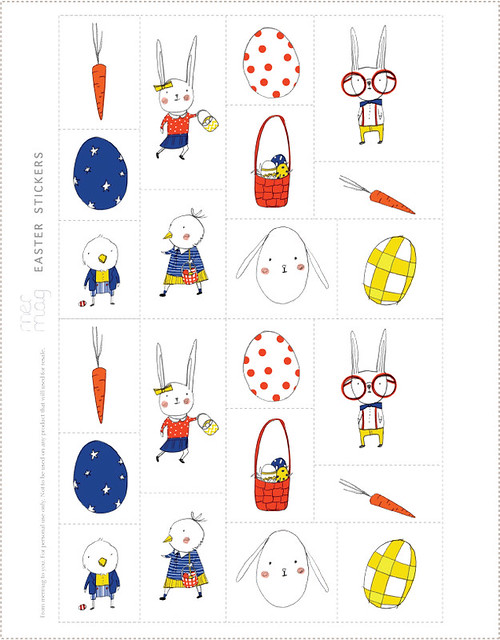
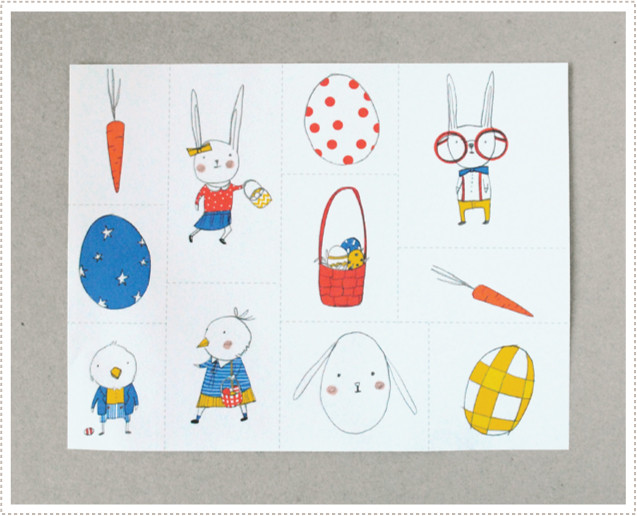
Are you running around crazy realizing that you have yet to purchase Easter candy, egg dye and various other Easter hunt amenities, and have absolutely no idea what your Littles will be wearing on Easter Sunday? If so, you're not alone. I'm right there with you. But I can help...at least just a little bit. Forget some of that candy and fill up those plastic eggs with some free downloadable Easter stickers that I illustrated. Your kids will love it and you'll enjoy forgoing some of that after-sugar shock.
MerMagEasterStickers4
To get started you just download the free printable stickers and print them out on full sheet label paper (found at your local office supply store).

MerMagEasterStickers2
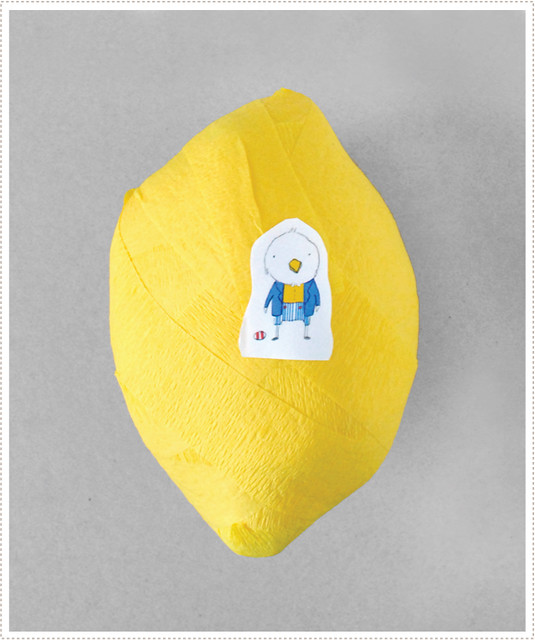
You can then cut them up and place them in plastic eggs or have fun with it and hide them in a crepe paper surprise ball! (or surprise "lemon" as mine turned out to be).
MerMagEasterStickers3
A group of us got together last night to make some of these for our Littles and it was so fun! Read more about it here on Sarah Jane's darling blog (and be sure to download her adorable little bunny puppet while you're at it). Surprise balls are so fun and not as much work as I would have originally thought. It's an endeavor I'd highly recommend (especially amongst friends).

MerMagEasterStickers5
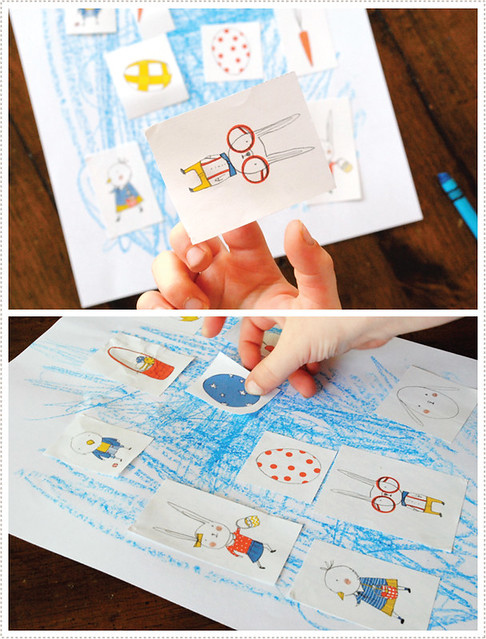
And as for the stickers, well my Littles have really enjoyed playing with them and have created identities for each character. I just gave them some paper, crayons and the stickers and let them go at it. And for about 15-20 min they were happily self-entertained. I'd say that's a success.