
[Quilt How-to]
OK, so I officially have the quilt bug. I get it. While my quilts up to this point have been very simple, I understand why spending long hours, working on intricate patterns and tiny stitches is completely worth it...and...slightly addicting.
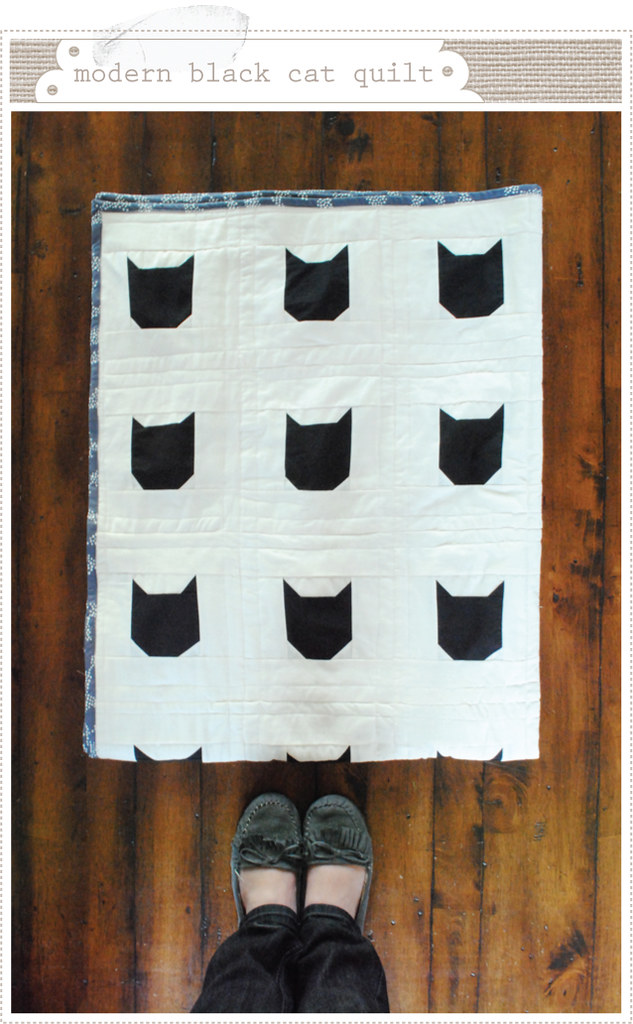
I've had in my mind a simple modern black cat quilt idea for a year now. I wanted to do it last year around Halloween/Fall but didn't get to it. The idea was still intriguing to me this year and I knew I had to do it. After things got settled here I quickly got to work and managed to get this done just in time for the season. And we have loved every stitch of it since.
The boys have spent many a moment curled up on the couch with a book, all snuggled up in our new cotton creation. I knew that I loved it but I was especially pleased to see that the boys really have taken to the quilt as well. They just knew that it was something a little more special than our typical throws (they had seen me work on it so they had a rough idea of how it came to fruition). And Little A loves that it has a cat motif (we call him A-Cat as a nickname). In fact, he asked me if he could take it with him to bed tonight, and I let him...just this once.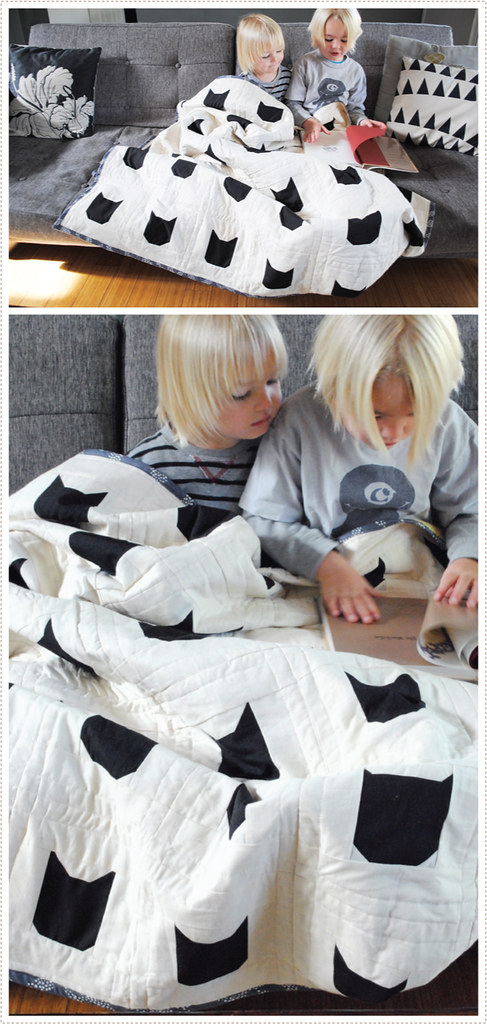
After a bit of trial and error I came up with a patchwork construction that I was pleased with and I'm more than happy to share the step-by-step process with you here. If you have ideas to do this quicker/easier/better/etc. please do share! (I recently did a quilt where I cut up a bunch of triangles and then at the end of it all I realized that I didn't need to cut so many triangles! I could have just done one large one and then later quilt it down the middle. That's what I get for just winging it! :)).
OK, so to start, you will need to cut the following shapes in the following sizes (or adjust to whatever ever size you prefer). I have 42 cats total so the following cutting instructions are for this amount. I chose to go with all black cats to keep things graphic and modern but I think a gray to black ombre affect would also be fun as well as an assortment of similar toned patterned fabrics.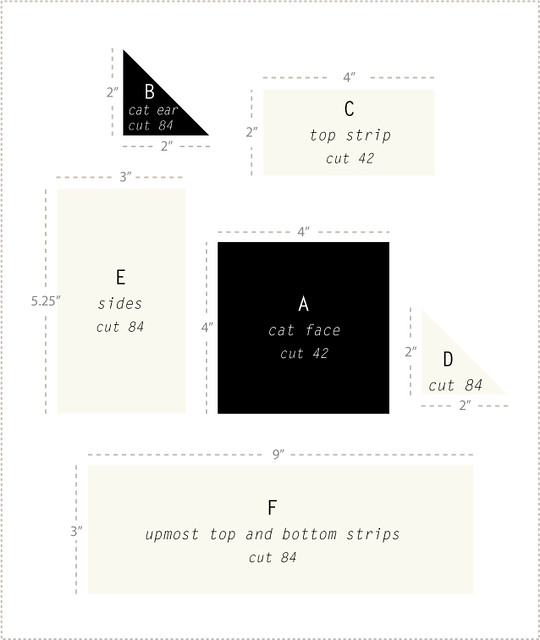
Once you have all of your fabric pieces cut, you can proceed to piecing the quilt squares together.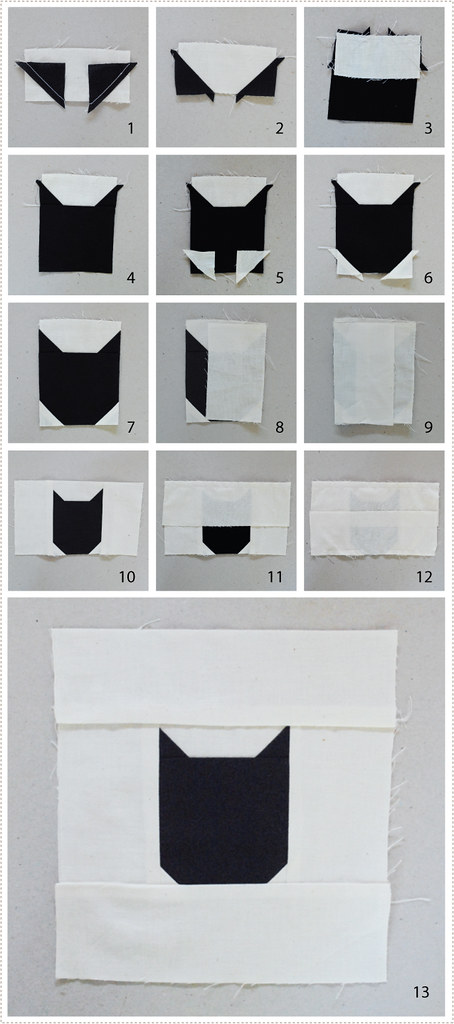
1. Sew two B triangles onto one C strip as per the photo. Let the tips of triangles hang over just a hair.
2. Turn down triangles (cat ears) and press.
3. Turn strip with ears around and sew to A (cat face).
4. Turn around, flip ears up and press.
5. Sew two D triangles onto the bottom of the cat face as per the photo, leaving tips of triangles hanging over the edge a bit.
6. Turn lower triangles down and press.
7. Trim excess fabric.
8. Sew one E rectangle piece to right side of the cat face.
9. Sew the other E rectangle piece to the opposite left side of the cat face.
10. Turn sides over and press.
11. Sew F rectangle to top edge as per photo.
12. Sew second F rectangle to bottom edge as per photo.
13. Turn top and bottom rectangle pieces out and press.
From there proceed to finish all cat quilt squares (I know it seems like a lot but pop in a movie each night while you are working on these and you'll have them done in no time!). Every quilter has a different take, but I must confess that I don't mind the imperfections that I experienced along they way. There were a few quilt squares that I set aside there weren't "perfect". The cat ears were to small, or not even, or there was some other quirk. In the end, I couldn't bare to discard them. They were part of my quilting journey and each told a little story (I can seriously remember what I was specifically watching or talking about during a couple of these squares). I had to include them and I'm so glad I did. For me, they add so much to the quilt story.
Once quilt squares are complete, proceed to sew them together one row at a time. Then sew each row together, being careful to align seams.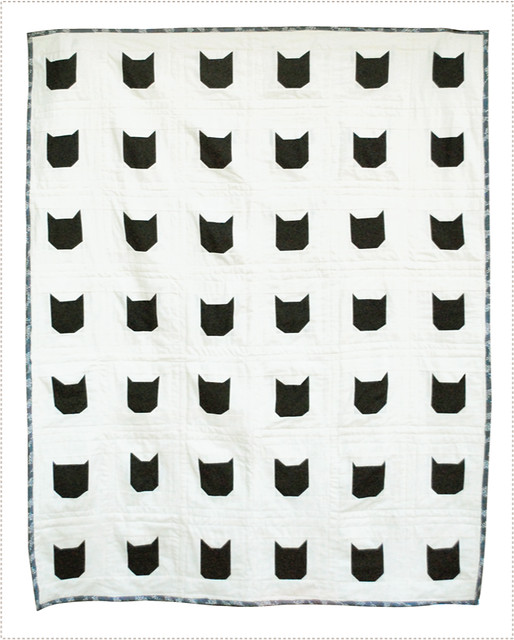
From there proceed to baste together your top patchwork, batting and back of your choosing (you can find a number of tutorials for how to do this on various quilting sites and blogs and youtube).
For my back, I literally pieced it together from scraps I had with no prior planning. That is what I love about quilt backs, you really have free reign and can have a lot of fun with it. I then chose a simple quilting stitch that really highlighted the cat squares (and was easy for me to do on my personal machine).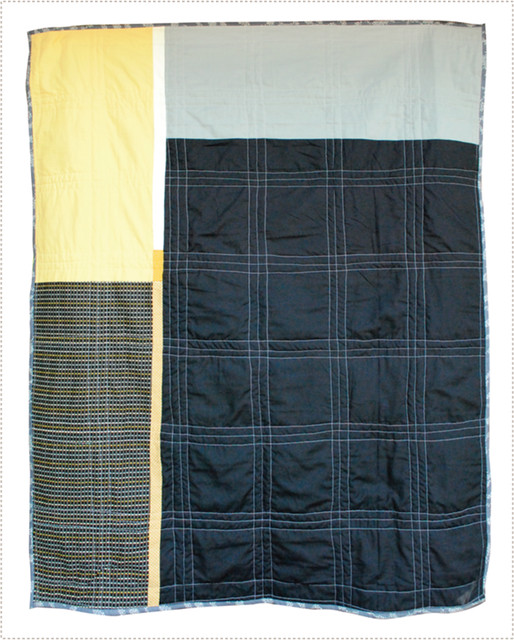
And I must say, one of my favorite parts of the quilt is the binding. I spent a lot of time pondering and searching fabric stores for just the right look and I was so happy to have found the fabric that I did. It just makes me smile when I see it.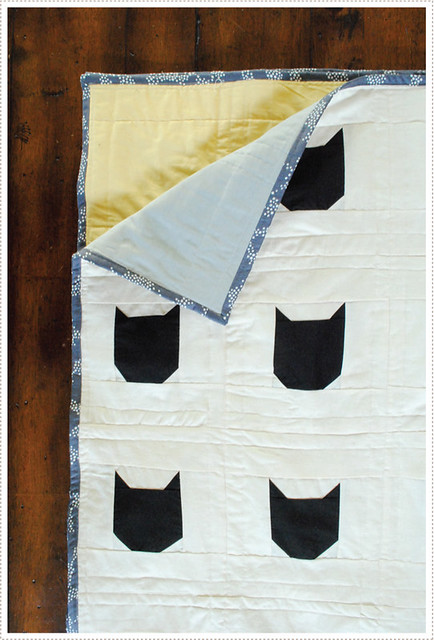
And as much as my boys love this quilt, I think I might love it a tad more.
I've done a couple of quilts geared for my kids but I have to confess...as much as they love this...it's secretly a quilt just for me. It makes me so happy to look at it and even more so to cuddle up in it with my boys, with Jon ;), a good book or just for a little snooze.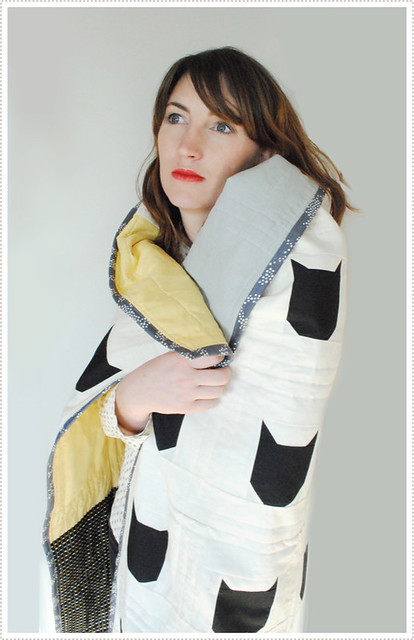
And that is what I love about handmade quilts. They are so much more than just a blanket. They bring joy, comfort, warmth, love and a smile to your face. And there have been a number of smiles in our house as of late.


When i first saw the motif, I thought of Transformers! (-:
ReplyDeleteha! maybe that's the real reason my boys like it so much. :)
ReplyDeleteLove the quilt and I love your ending comment. I wholeheartedly agree!
ReplyDeletethis is a stunning quilt! so generous of you to share the pattern. Thank you!
ReplyDeleteSo clever! I'm quilt obsessed, and nervous to make my first one!
ReplyDeleteThis is fab, if I made one it would be covered in cat hair instantly!!
ReplyDeletethis is gorgeous and only makes me want to have a bash at a quilt even more!! good work :))
ReplyDeleteOh I love this! This would be perfect in my house as we have two black cats!
ReplyDeleteGreat tutorial, thank you.
Oh, this is DEFINITELY my new winter project. How much of each fabric did you need to complete the quilt?
ReplyDeletewow, that is beautiful. can you make me one? i would buy this in a heart beat.
ReplyDeleteI just wanted to tell you how lovely your pennants in the gifted mag are! thank you so very much. i love pennants. yeah Christmas xoxo.
ReplyDeletemy little boy thought it looked like Batman. That's his thing right now!
ReplyDeleteSo great!!!! Woo hoo Mer! I am glad you found something to make your life happier! Those things are priceless!!!
Brilliant! Now I've got a first hand on how to do this things, I'm thinking of personal made quilt for this winter. :D
ReplyDeletewow account for sale
Oh wow, this looks really great! Somuch work and love has gone in and it shows ;-)
ReplyDeleteIt's fantastic! I've had hopes to start a quilt for a while. Maybe seeing yours is just the right kick in the pants I need to get started.
ReplyDeleteOH Mer it is so beautiful!! I love it. And quilting is very therapeutic! I'm glad you found something wonderful to bring you simles. :) love you
ReplyDeletepurrrfect!
ReplyDeleteCool quilt! I love that shade of lipstick you're wearing. What color is it and who makes it?
ReplyDeleteThis is so rad.
ReplyDeleteThis looks a lot like Leah Gorens cat print dress...
ReplyDeletehttp://www.leahgoren.com/index.php?/patterns/cats/
Veronica-thanks for asking. It's called retro red and it's the simple drugstore brand N.Y.C. I like it because it looks just like it's name: retro red.
ReplyDeletewhat size batting did yo use?
ReplyDeletehi golubee- good question. I used Warm & Natural batting. does this answer your question?
ReplyDeleteI really love this... How much fabric did you need to buy?
ReplyDeleteHi there...I have made one or two simple quilts in the past, but never attempted something like this...my daughter would LOVE this quilt though and am thinking of making it for her birthday in September (we have a black cat named Merlin who is truly the "man of the house") So my question is, if some of the squares are not perfect in dimension, how did you get your quilt to come out so even? Does this make sense? Forgive my novice question but I REALLY do want to make this for her!
ReplyDeleteHi Jennifer,
DeleteMy squares weren't perfect but when stitching the squares pull and stretch the fabric so that it lines up with the seams of the squares below (if that makes sense). you should be able to get things pretty lined up this way.
good luck!
xo
Mer
Hi! I just wanted to say that I followed your tutorial and just finished quilting it up today! I love it so much and it was so much fun to make. Thank you so much for sharing the directions online, that was really kind and gracious of you!
ReplyDeleteThanks so much!
so fun Carolyn! You'll have to send me a pic of the finished product. I'd love to see it!
Deletexo
Mer
Hello!
ReplyDeleteI am planning on making this quilt, but giving myself a headache trying to figure out what dimensions yours ended up being. I plan on making a version for a queen, so I'm debating between making the cats bigger or increasing the number of kitties! Eek! My brain hurts.
Hi!!! I love your quilt!!! Love it!!! Your boys are too cute!!! Thanks so much for the pattern!!! This will be wonderful to work on!!! I do love black cats but I can see this in so many colors!!! Your instructions are so great that I think I can make one!!! Thanks so much!!!!
ReplyDeleteHi there! I'd like to make this quilt for my daughter. How much fabric do you need of the black and white to create the top? What is the finished size of each block? Thanks! :)
ReplyDeleteHello, Thank you sharing such a great pattern! I just finished my version last night. I used black corduroy for the background and different colored, patterned fabric for the cats. I put an extra border around to make it big enough to cover two long legged kids. I tried to use lighter colors for the backing to brighten it up a bit. I'm so happy with it. Thanks again!
ReplyDeleteKatherine
How bog does the quilt end up being?
ReplyDeleteWhat are its dimensions?
Love this! Thank you so much for sharing!
ReplyDeleteHi, can you tell me the amount of fabric you used? I'm also wondering if you can tell me the finished size of each block and if you used a quarter inch seam allowance? It's a darling quilt and I would love to make it!
ReplyDelete