
[DIY coral-motif pillow]

These past few weeks have been a crazy whirlwind of moving, getting Little A ready to start Kindergarten (sigh..) and working on a number of illustration jobs. To keep me up at night and plowing forward, I consumed a marathon's worth of HGTV Design Star, Dear Genevieve and finally managed to get caught up with Secrets From a Stylist (loving that Emily Henderson. Does she not have the coolest style or what? Not just in design but I totally want her wardrobe, right?). So after being inundated with tips and tricks for the home, I couldn't help but take a little time out to do my own little home decoarating. And what better way to add a little pop in your home than a throw pillow? And one with a touch of gold, ikat and a nod to the sea? Even better.
I'm sure by now most of you are experienced in the art of freezer paper stenciling (or are at least familiar with the technique) but I went ahead and showed you how I went about creating this hand painted motif in a step-by-step fashion.
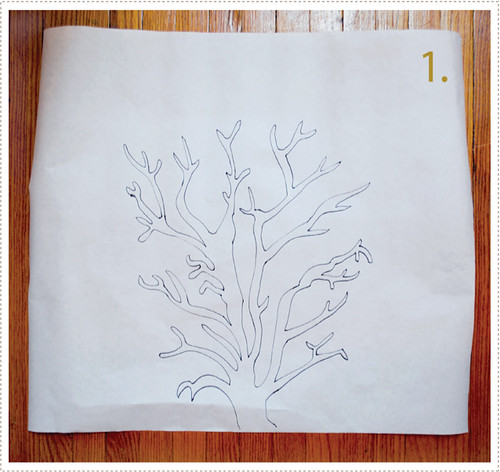
1. First decide what size and shape of throw pillow you want (I found a good guide for this here). For mine I used a down pillow form from a old throw pillow that I already owned and wanted to update. I then cut out a sheet of freezer paper that that was roughly the size of the pillow case. From there I drew the design I wanted right onto the freezer paper.
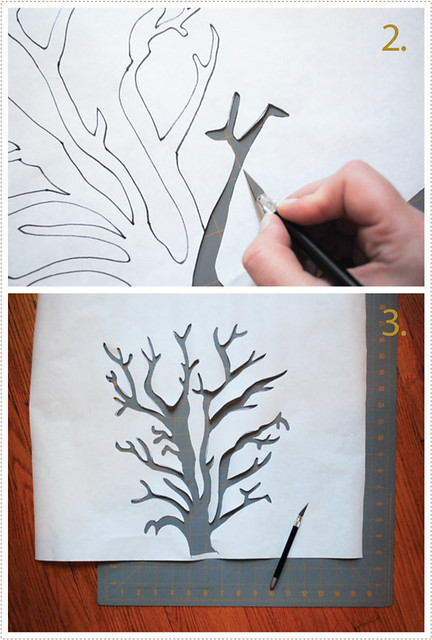
2-3. After the drawing was complete I began cutting. To do this, place the freezer paper over a self-healing mat and then use an x-acto knife to cut out the design. Intricate designs like this take a little bit more time but are worth the pay off in the end, so hang in there :).
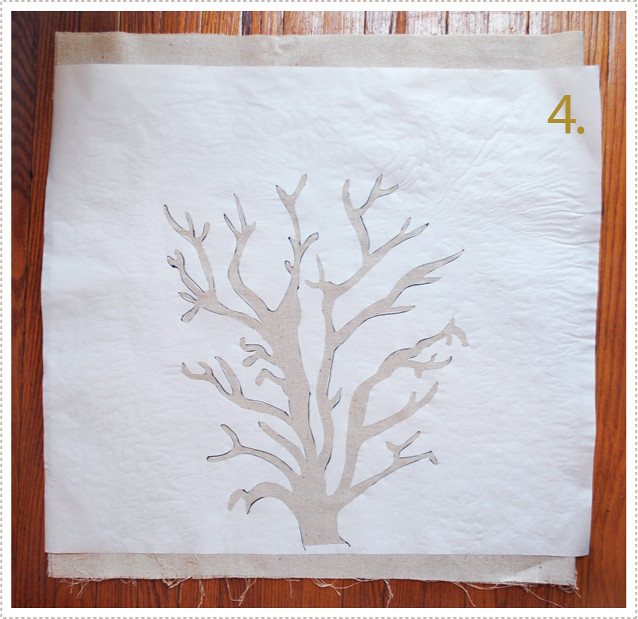
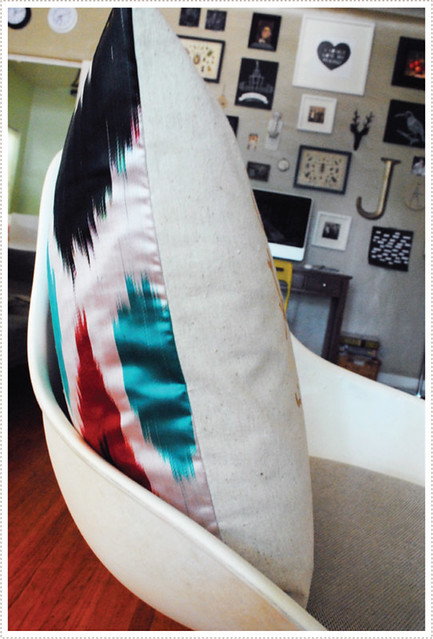
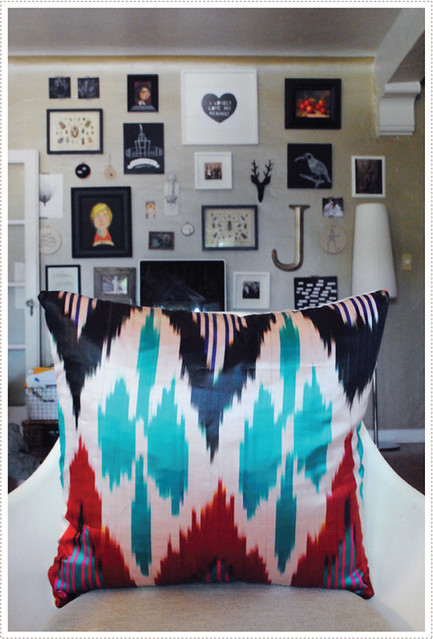
4. After cutting, iron the paper (shining side down) onto your choice of fabric. For mine, I chose a linen for the front and a bright silk Ikat pattern (purchased from eBay) for the back. (For pillow sizing/sewing techniques and instructions, I always refer back to this Design Sponge tutorial).
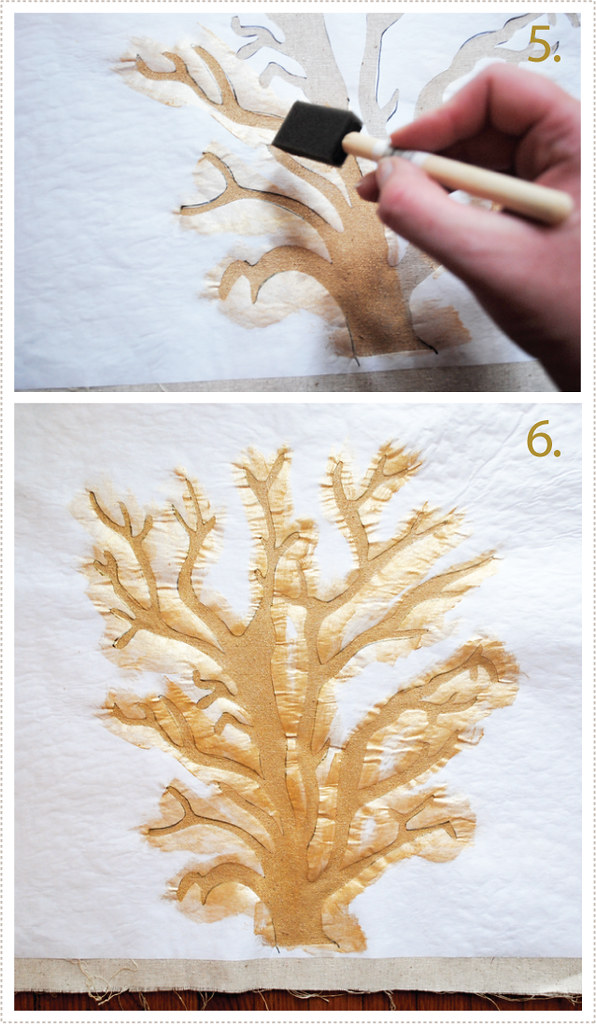
5. Once the freezer paper is securely ironed onto the fabric, you can begin painting (be sure to place a card board box or something similar underneath so that the paint doesn't bleed through to the surface below). I was really feeling gold for this so I chose a metallic gold fabric paint. I like sponge brushes for this as they really help to get smooth and precise coverage.
6. Once you have painted all of the necessary areas, set it aside and let it dry. Some recommend letting it dry over night before taking the stencil off. I did that with my first freezer paper stencil but have since found that I can get just a good results if I let it sit and completely dry before taking the stencil off. Could be an hour or more (or less) depending on the size of stencil and amount of paint used.
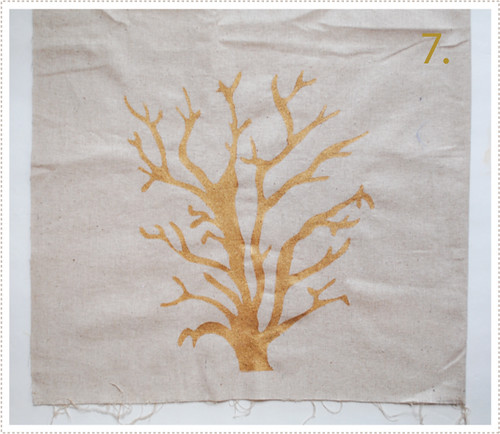
7. Once the paint is completely dry, carefully remove the stencil. This is such a fun part, as you finally get to see the finished painted design in all it's glory. Sit back an enjoy it.
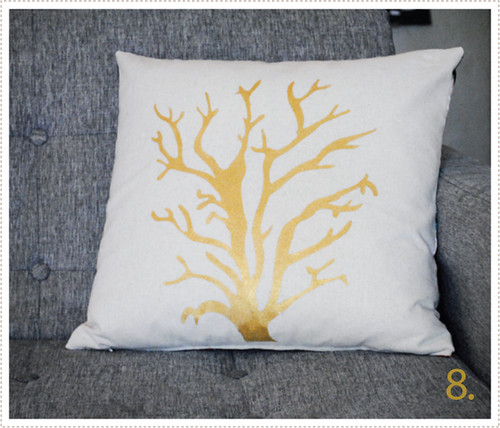
8. Then complete your pillow by sewing together your newly custom painted fabric with your choice of back side fabric. (Again, I used this zippered throw pillow tutorial to do this).
When it's all complete, toss it on the couch and sit back and enjoy your new creation!
And...if you are interested in doing a coral-motif like mine here, I've offered up a stencil for you to download by clicking here. It's created on 8.5x11 paper for you to print out but if you want to increase the size you can take it to your local copy center and have it enlarged there.
Enjoy!
(Oh and if you make a pillow, tote bag, shirt, etc. using this motif, I'd love to see how it turns out so shoot me an email. Thanks!)
(Oh and today is Jon and I's 10th anniversary! can you even believe it? Happy Anniversary Jon!!)


You are just so talented, I love everything the coral, the metallic, the back fabric, that you sewed this yourself and that you had an HGTV marathon. I heart Emily too;)
ReplyDeleteHow on earth do you have time to be doing this while you are packing and unpacking? You are a wonder! Hope the move went well and you are all feeling at home...
ReplyDeletei love this! thanks for the template, too.
ReplyDeleteI know Brooke! I was going to have my annual "tea party right when I am about to move" celebration but decided that that was really going to be too much. So I settled for a pillow instead. We are settling nicely but already miss those cool Cali nights! I forgot how it doesn't cool down at night during summer here.
ReplyDeleteHi Mer :-)
ReplyDeleteI am on the hunt for a coral stencil and inspiration. I ran across your blog this morning and all I can say is bee-u-tee-ful!! Like Brooke...I wonder how you find the time :-) I scramble with all that I have to do and then try to squeeze in craft time. Would you know where I can find a coral stencil like yours? Your link isn't working anymore and I would love to try this on a pillow for my home office. Thanks.