[A little color theory for...]

|
skip to main |
skip to sidebar
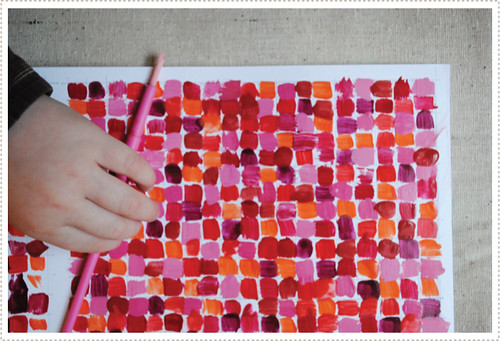
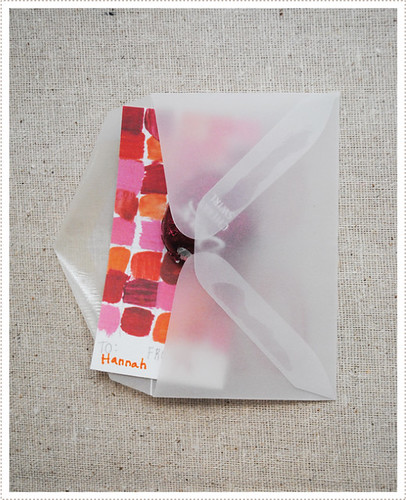
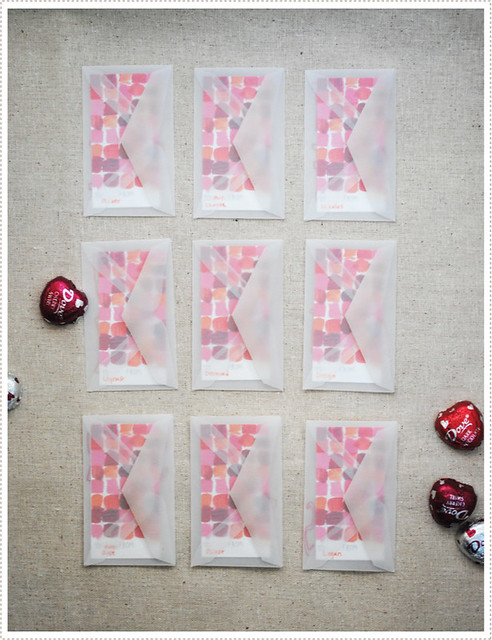
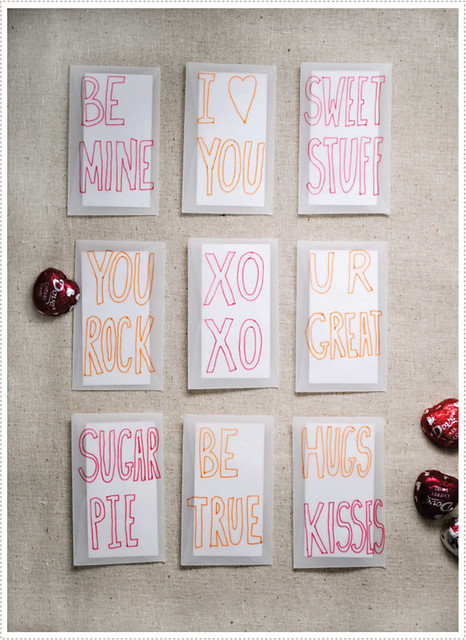
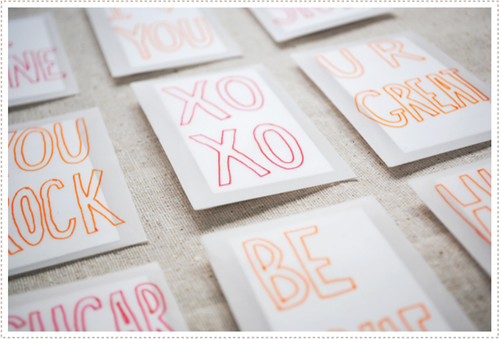
1.31.2011[A little color theory for...]Can I just say that any holiday that uses an overwhelming amount of saturated reds and pinks in it's celebration is OK by me? As I was going through my Valentine inspiration files this year I couldn't help but be overwhelmed by the powerful, strong colors popping off the pages. I was inspired...and the artist in me just want to dip my brush in and explore the variation and intensity of the wonderful hues. So for this years Valentines cards, that is just what Little A and I did. We jumped right into a little "Color Theory 101", and ran with it. I started us out by going through my acrylic craft paints, choosing a variation of beautiful reds (wine, cranberry, tomato, blood, etc.) and then threw in orange to warm things up and white to push us a little into the pink zone. Little A got right to work. He was very interested in blending colors so we got to the pinks right away. From there I had him mostly work with one color at a time, blending here and there with other colors if he chose to. I was sure to point out the amazing, subtle variations that one hue, RED, could have. I also worked right alongside him, helping him fill in random squares throughout the grid. He got really into it...taking things pretty seriously (as you can see here). In no time at all, the entire grid was filled with delicious, eye popping colors. It really was a little mini work of art. In fact, I almost hated the idea of cutting this up into little Valentines...I almost wanted to frame it and hang it on the wall!  Well cut away we did (but not until I scanned it in), creating little mini custom works of art for each of his classmates and teachers.  We then addressed the cards and fit them into business card size vellum envelopes (that I've had hanging around, and dying to use, for forever).  Of course no Valentine would be complete without a little candy, so we placed a decadent dove chocolate cherry swirl heart in each one (and can I just say yummy!).  I then added little conversation heart sayings to the front of each envelope using some of my favorite pens (these seriously come in SO handy. I'm addicted...and you will be too).  Little A and I had a wonderful afternoon creating these. In fact he's asked me a couple times since if we could make more valentines...  and hey...I'm all for spreading the love around... ...so much so that we have created a downloadable pdf version here for you to use if you don't have time to make one of your own. Just click here to get started. (And if you are looking for more V-day fixes this year, check out our piratey Valentines downloads from last year (recently featured on Parent Map and Crafty Crow). They were a big hit with Little A's mateys!). ** All downloads are for personal use only. Please do not use for resale, or commercial production.
Posted by
mer
at
1:00 AM
51
comments
Labels: art, craft, DIY, holiday, kids, painting, tutorial, valentines 1.11.2011[the gifts of 2010]When Jon and I were dating he made me a bouquet of paper tiger lily's for Valentine's that I absolutely fell in love with (a great way to score some serious points with a budding art student, don't you think?!). And it so happens that I fell in love with him as well...and things only continued to bloom from there. It's now sort of become our thing - in the past nine years (whew! I know, can you believe it!) he's given me various lovely botanical creations in paper, copper, you name it. In spite of all of this, nothing could have prepared me for the absolutely incredible paper flower creation, inspired by paper artist Jen Stark, Jon gave me this past Christmas for our $0 gift exchange. When I opened the package I was completely speechless. I had no idea he'd gone to such lengths to create such a stunning and beautiful piece of art. I'm so enamored with it. We're now trying to figure out how to hang/display it. I'm not sure if we want to keep all the extra paper that fans out into a spiral or if we want to somehow cut it off (Jon wasn't sure so he left it for me to decide). I like it...but then I also like the idea of the focus just being on the flower. What do you guys think? Trim it, or leave it? And how to hang it? (All the petals are cut out from the paper beneath. No paper is, at this moment, adhered to another).
Posted by
mer
at
9:33 PM
14
comments
Labels: Christmas, craft, holiday, slices of my life 1.05.2011[the gifts of 2010]Jon and I decided we would loosely follow last year's $0 gift giving theme for Christmas 2010. Meaning: we would try create the gift with little or no $ but spending a little on supplies, etc. was allowed, if needed. I decided on a simple paper cut heart with a little saying that was meaningful to our family. Our little family has a tradition of cranking up the music and joining together in an impromptu dance party. We do this whenever anyone initiates it. Someone cranks up a song and all are expected to stop whatever we are doing and go over to where the music is (typically on Jon's computer) and dance, dance, dance! One of our all time favorite dance party songs is the Yo Gabba Gabba's "Lovely, Love my Family" perfromed by the Roots. So it only seemed fitting to use this song title for my gift. Jon loved it and we added it to our ever expanding wall of art (which is incredibly difficult to photograph well due to our "napping house" quality of light we've got going on here as well as the iridescent paint that the previous tenant put on the walls - which is very reflective...and I'm too lazy to repaint it...). I also gave Jon a book of our 2010 Christmas photo shoot. There were so many great photos, thanks to Jordan, that needed to be recorded and enjoyed for years to come. I hadn't completed the heart cut out when I ordered the book so I simply added the title using type (although I wish it had the custom cut out letters).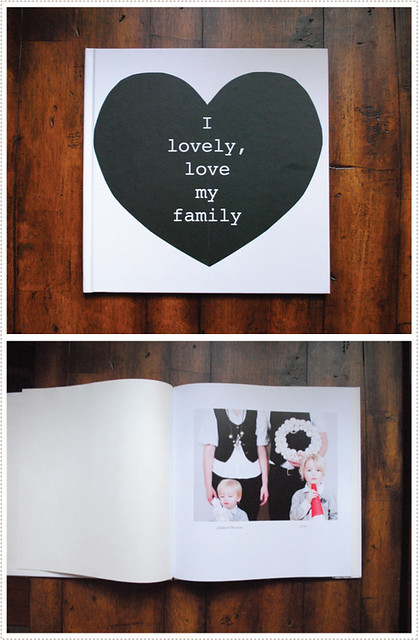 The book did not fit into the $0 gift theme but I have to say I'm pretty proud of how much I did pay for it. I managed to purchase a $50 blurb voucher via Jasmere for $22 (score!) back in October. I was able to get a 12x12 inch book with the voucher and I couldn't be happier. I did end up paying a little more for matte pages, but with the discount, it was all still very affordable. What a great way to record the happiness of this past year!
Posted by
mer
at
6:19 PM
9
comments
Labels: craft, graphic design, holiday [Starting a New Year, and a...]Happy 2011! I hope all of you are rested and rejuvenated after spending time with friends and family and ready to take a on a new year. I love this time of year...it's a great time for change, for renewal and for reflection. And don't you just love to look back and reflect on the last year? When putting together my 2010 Christmas cards I just couldn't believe how much time has flown. My boys are getting so big and life is speeding by. This year I really want to do all I can to slow down and simplify - so that I don't miss the most important things in life - such as taking more moments to really spend quiet time with my littles, enjoying their individual personalities and cultivating their unique talents. Having said that, I've found myself entering the new year with a very full plate. I've got a number of exciting projects already in the works that will keep me pretty busy this month, but I'll do my best to stay up to speed here on mermag, and check in when I can. Thank you all for a wonderful 2010 year! Here's to another one ahead!
Posted by
mer
at
5:51 PM
5
comments
Labels: Christmas, graphic design, holiday, photography 12.24.2010[A Very Merry...]
Posted by
mer
at
1:23 PM
10
comments
12.20.2010[Thinking...]
These super simple origami boxes filled with some delicious goodies are just thing to put a smile on their faces. And if you are more on the ball then I am, fill them with scrumptious confections straight from your kitchen. Otherwise, find some store bought delectables, add a bit of holiday trimming, and you are all set! Now on to that sewing, wrapping, and last minute shopping I've got to do!
12.13.2010[cards for the teachers and a...]
Now on to the rest of my Christmas cards! (If only I was ambitious enough to do origami trees for all of these...) (oh and I'll share more from the photo shoot later...after I've got my Christmas cards out :)).
Posted by
mer
at
11:38 PM
6
comments
Labels: Christmas, craft, DIY, graphic design, holiday, photography 12.10.2010[slow down, you move too fast. you've got to...]
The boys were very happy with their work and the Christmas spirit began to resonate throughout our home. Can I just say I love this time of year! Little O is walking around singing Jingle Bells and Little A is trying to figure out how Santa is supposed to get to our house if we don't have a chimney (he doesn't like the idea of him using the door...just doesn't seem right I guess). And don't worry, I still have a few creative ideas I want to share, and you can hop on over to Giverslog to see what I'd slip into santa's sleigh for all of you if I could. Hope your season is feeling merry and bright!
Posted by
mer
at
5:51 PM
6
comments
Labels: Christmas, holiday, slices of my life 12.01.2010[brown paper packages tied up with string...]If you are lucky enough to live by a Trader Joe's, or in my case right across the street from one (far too dangerously close to those Candy Cane Joe's Joe's!!), then you probably have seen their fantastic holiday paper bags. When Jon came home with a few the other night I couldn't help but swoon over the marvelous, whimsical illustrations that adorned their bags. Being a lover of brown paper, a fan of great art and design and an advocate for reusing great shopping bags I knew at once I had something here - beautiful wrapping paper right at my finger tips...and the best part...it was totally free! After trying to do a search for the illustrator hired to do such lovely drawings, I soon discovered that I was really behind the times. Apparently Trader Joe's has had this same bag design since at least 2008 when the creative Katie Chambers of Ink&Post reused these bags and made some pretty fantastic DIY labels (which Design Sponge even covered...hello...where have I been?). I have to say, these are way cooler than my simple idea of wrapping paper...Thanks Katie for the inspiration (even if I am 2 years late!). 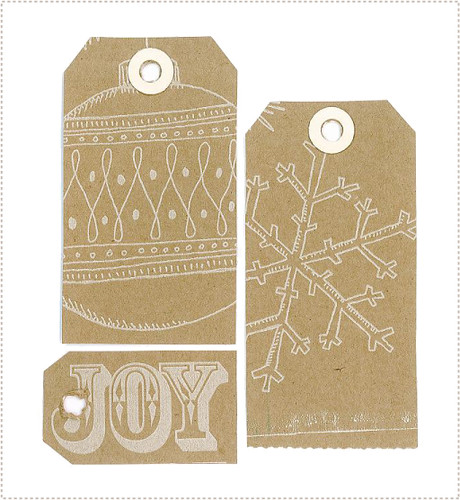 Oh, and I still haven't been able to find out who the illustrator/designer was on these so if anyone knows, pass it along. Happy Re-giftwrapping!
Posted by
mer
at
1:34 PM
16
comments
Labels: Christmas, DIY, graphic design, holiday, patterns 11.29.2010[Cyber Monday Sale!]
Posted by
mer
at
10:50 AM
0
comments
Labels: etsy, illustration, my work, promotion 11.10.2010[Little O turns 2!]Little O (formally know as Baby O...sigh...) recently turned two and we threw him a little Knights and Nobles birthday party, to coincide with his Halloween costume. With his b-day so close to Halloween we found that we need to either throw him a Halloween bash or a themed party based on his costume to make things easier during the holiday season. In fact, with how much I love to put together a party, and juggling between two boys, it became necessary to instill a new birthday tradition for our family. We will now rotate every year between a fun themed party with friends and a more low key, but equally exciting and special, day out with the family. This year was Little O's first big bash with friends. I had seen a sort of table tent a while back that I had fallen in love with and had wanted to make one for the boys ever since. I finally got to it this year and it was perfect for the occasion. I then made little dragon finger puppets as favors (I know, they look like horses...) popped a sucker inside, attached a name to each and hid them throughout the yard so that the littles could go on a dragon hunt and find their special dragon. I had grand plans to make a cake but it sunk after coming out of the oven an hour before the party (I tried to make a really tall one...I guess that's what I get for trying to side step the multi-layer technique...) and so I quickly made some chocolate cupcakes instead which ended up working out perfectly. We threw together a simple spread fit for a two year old - string cheese, crackers, grapes, juice and red vines - which were a great, drooly, messy hit with the little darlings (as if the chocolate cupcakes weren't messy enough!). And of course we brought out the boys Schleich castle and knights for decor/playing/what have you. The highlight of the party (besides seeing all the little princes, princesses, knights, etc. in their garb) was Jon's puppet show he put on with his very own handmade dragon puppet (which I was super impressed with). I'm pretty sure it was a big hit with all the littles as well - who proceeded to take turns puppeteering themselves with the coveted dragon and putting on performances. Great fun was had by all. The rain stopped just in time for the event and I couldn't be happier with how it all turned out. Happy birthday my little baby!
Posted by
mer
at
2:10 AM
10
comments
Labels: graphic design, holiday, illustration, kids, parties 11.04.2010[Halloween 2010]Knights, King Arthur, castles, dragons, etc....they are all a big deal at our house. In fact we keep the boys from fighting over their medieval acquisitions by giving all red knight paraphernalia to Little A and all things blue knight go to Little O. So it only seemed fitting that for this years tricks-or-treats the boys dress up as their attributed red and blue colored knights. Jon had purchased this wonderful wooden sword and shield set in London way back when I was pregnant with Little A (I guess we know where this affinity for knights comes from). I was at first sad that we didn't have a second set for Little O but, as my mother pointed out, it was probably a good thing as too much real sword fighting would probably be going on. 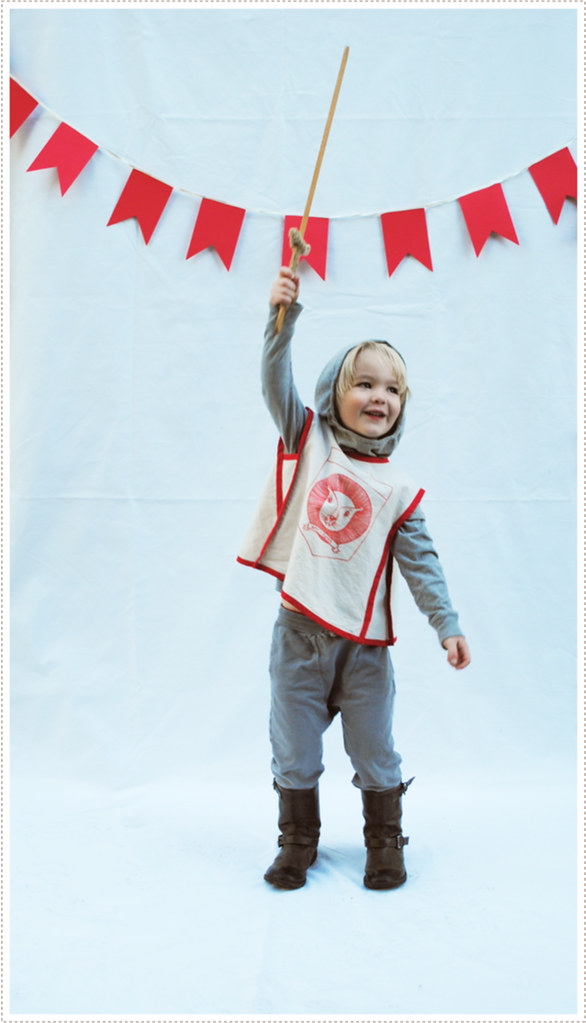 The costumes were pretty simple to make and put together. I sewed both the boys coverlets using a vintage 70's art smock pattern and then hand drew (with fabric markers of course) shields with the boys attributed animals within (yes, we have a lot of identifying going in our house: colors, animals, you name it...we like themes I guess. Little O is the bear and Little A is the cat (and in this case, a Big Cat, or a lion).) 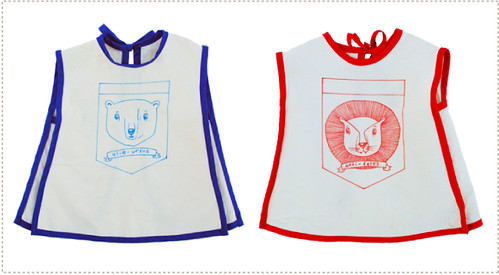 I sewed the hoods from a knight pattern that I already happened to have (and as you can see, Little O was not about to put his on) and then I just found grey shirts and pants to put on underneath. The hardest part of the costume was actually finding the boots. I found Little A's pair at Marshalls a while back but they didn't come in Little's O size so I was on the hunt for some time. I finally checked in at Target right before Halloween and they had the perfect black boots in Little O's size. Score!  Jon went as Robin Hood this year (he made his own bow and arrows and they were incredible!) and I was of course the medieval white cloaked ghost? or Maid Marion? or?... 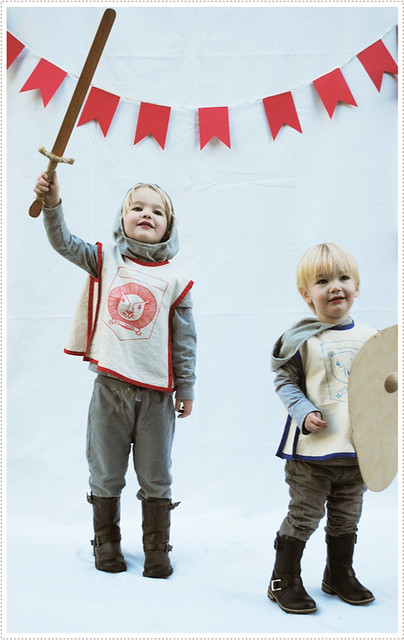 Needless to say the boys loved every minute of it. The costumes, the imaginative play, the trick-or-treating, the candy eating...all of it! (oh and in case you are wondering, I used the back side of the Halloween backdrop for this little photo shoot. So handy!).
Subscribe to:
Comments (Atom)

My name is Merrilee and I am an illustrator, painter, dabbling designer, crafter, seamstress and mother of two boys and a wee little girl.
I love to hear from you and see the crafts you have made from my tutorials! Email me at: merrileeliddiard[at]hotmail.com
Follow me on Instagram at @mer_mag and get more updates by liking MerMag's Facebook page. Thanks! Search This Blog
© All photos, projects, artwork and images are copyrighted by me unless otherwise credited. You are welcome to link to this blog and may use my images with the purpose of sharing when mentioning "Mer Mag" and including a link back to this site. If you do a project based on one of my tutorials, etc. please also link back to this site with a mention of "Mer Mag" in the text. Thanks!
Labels
|